Loyal Patron Website Tools Guide
Introduction
This Website Tools Guide includes implementation instructions for webmasters that covers the following engagement strategies for visitors to interact with your website:
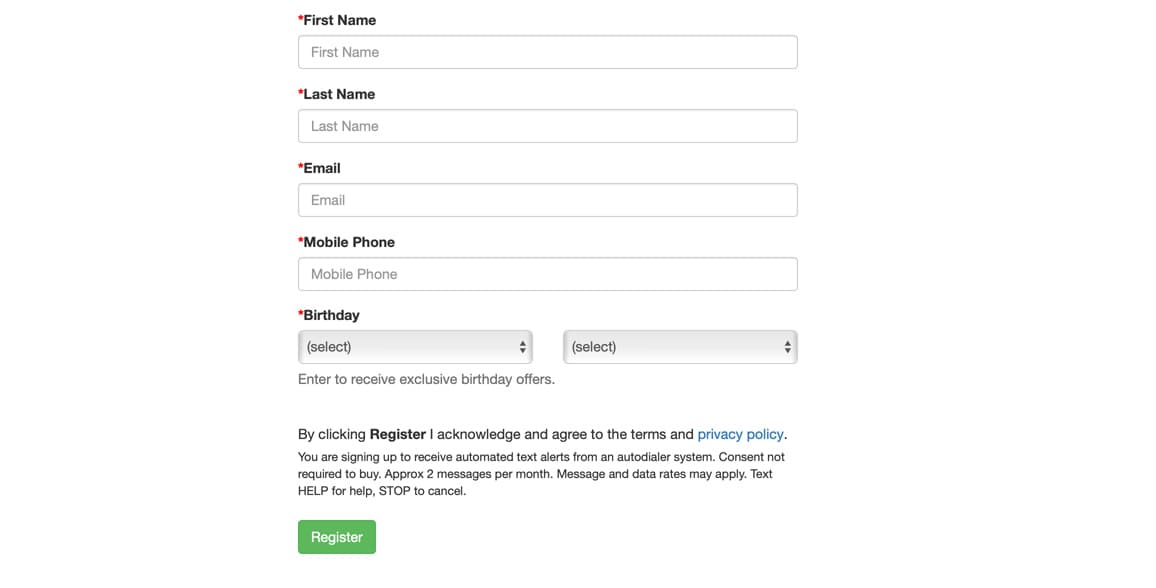
- Signup for your customer appreciation program directly over your website and immediately add the customer’s marketing profile (Name, Email, Mobile, Birthday etc.) to your private database. See Step 1 (Signup).
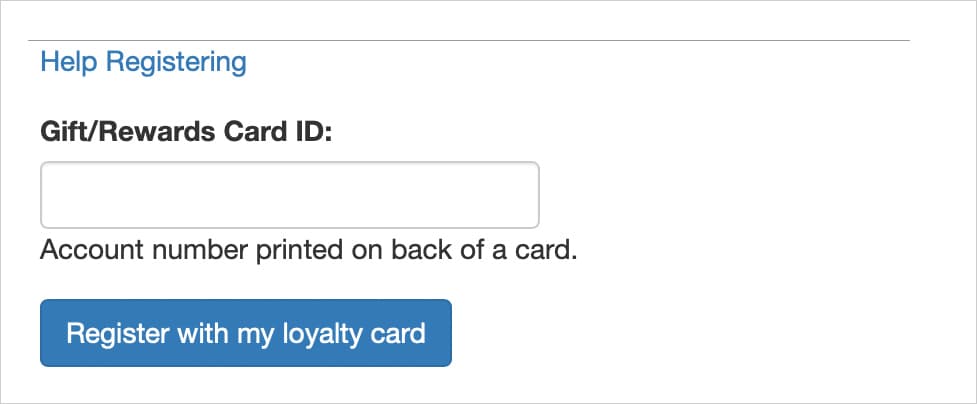
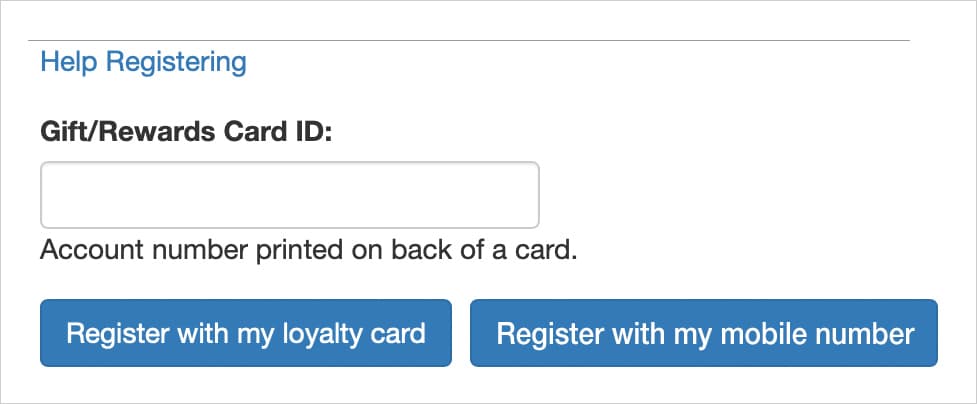
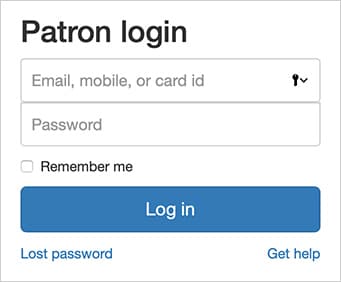
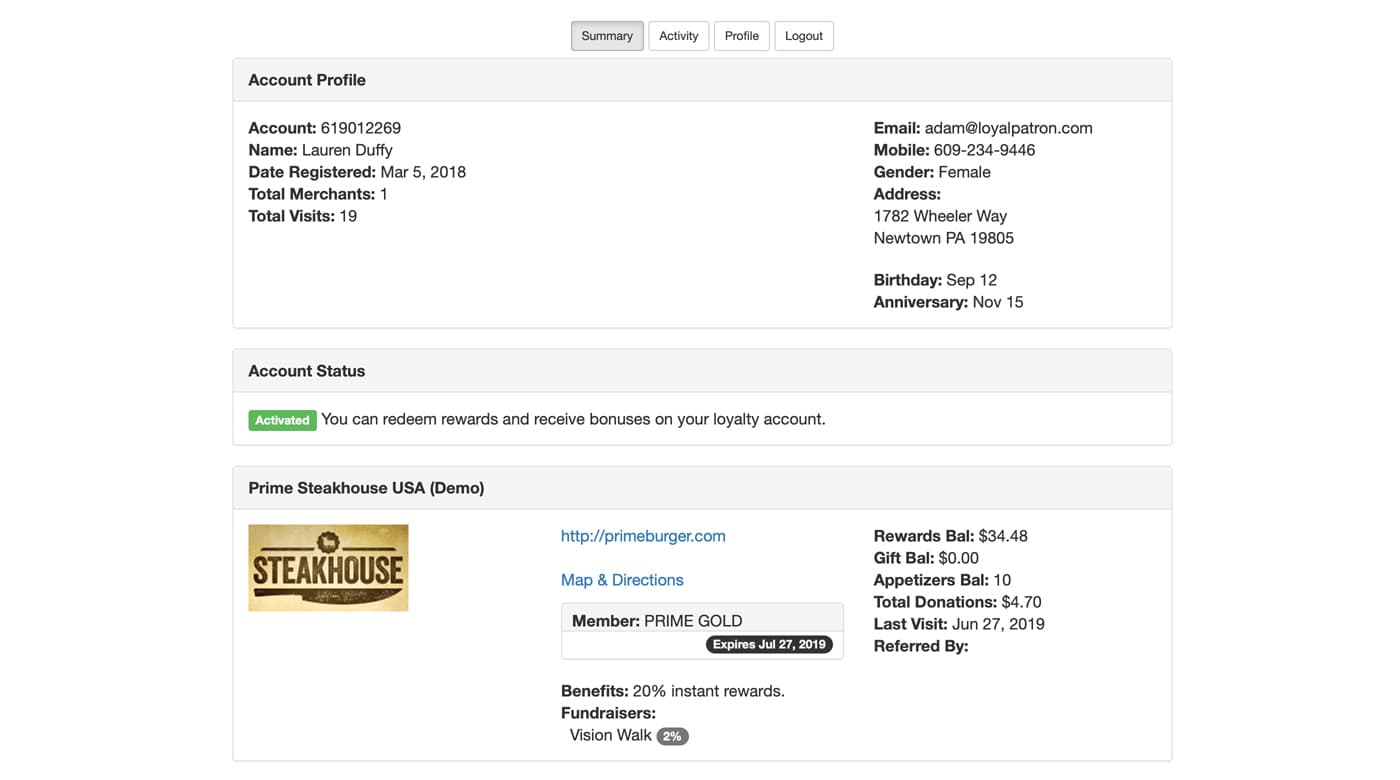
- If operating an optional stored value program where gift card and reward transactions are processed through a POS terminal, enable your patrons to login to their accounts online and check balances, update profiles and review transaction history. See Step 2 (Login).
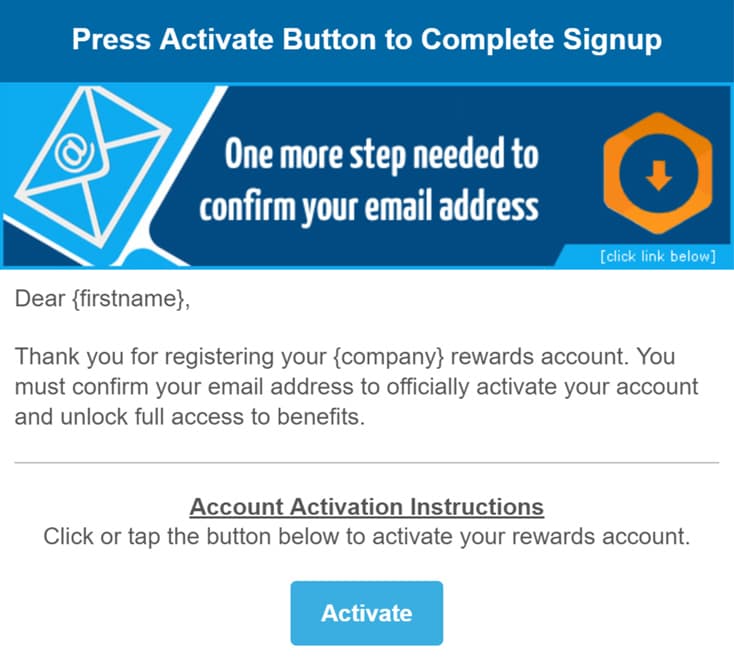
- Add a customized landing page off your website that brings customers who sign up in Step 1 (Signup) back to your website after a double opt in authentication to ensure their email address is legitimate. See Step 3 (Confirmation).
- Tips, strategies and example links for updating the site’s homepage navigation to draw attention to new links created during Step 1 and Step 2 (if applicable). See Step 4 (Home Nav).
- Instructions for testing the new signup page created above in Step 1 (Signup). See Step 5 (Test)
- Advertise optional membership subscriptions either sold to customers through a secure checkout form via Authorize.net or made available for free online. See Advertising Memberships Online.
We highly recommend you forward this guide to your webmaster for implementation. Your webmaster will be the ideal resource to perform this straightforward implementation as they are familiar with your site's layout and branding schematics.
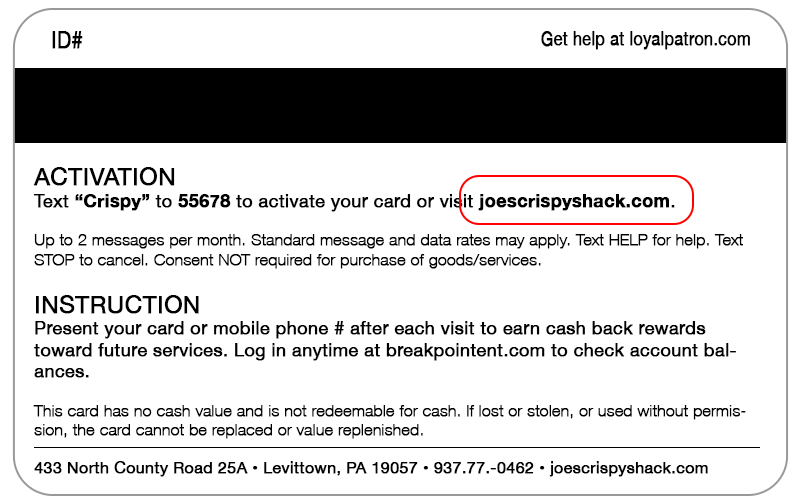
EXTREMELY IMPORTANT FOR BUSINESSES THAT DISTRIBUTE CARDS
If your business circulates gift cards and/or rewards cards as part of a stored value program where the back of your card advertises your website address as an online card activation option and you can't complete this website tools guide implementation before the cards are distributed to patrons, BE SURE TO PUBLISH PROMINENT BUTTONS/LINKS ON YOUR WEBSITE that will redirect patrons back to the proper Signup and Login links on your vendor’s default program website.
Create an Activate Account button/link that links to
<a href="https://loyalpatron.com/lp_patron_register_activate_card.php">Activate Account</a>Create a Member Login button/link that links to
<a href="https://loyalpatron.com/lp_patron_login.php">Member Login</a>These links will temporarily allow patrons to register and login while you complete the full integration.